Przeskocz do treści
Zrób to sam
Porady Inspiracje
Poprzedni obrazek
Następny obrazek
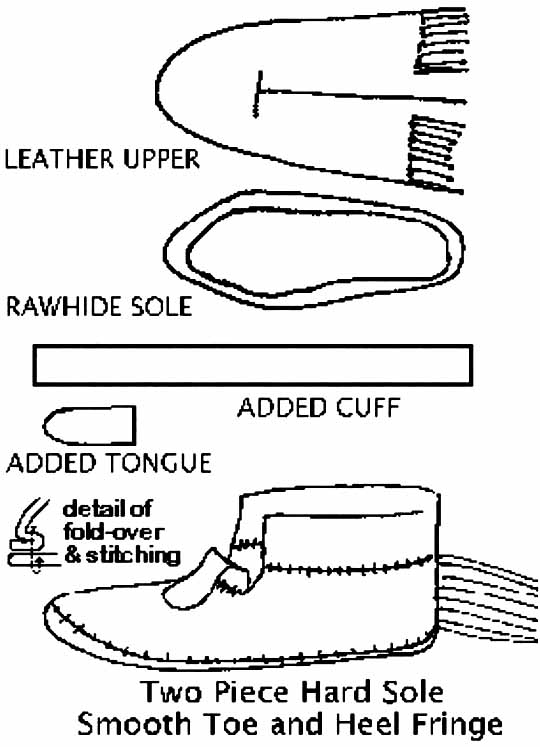
mokasyny
Polecane dla Ciebie:
Mokasyny
Nawigacja wpisu
Opublikowano w
Mokasyny