Rekuperator z poliwęglanu.
Kwestia efektywności energetycznej dotyczy chyba każdego właściciela nieruchomości. Zwykła wentylacja jako sposób na odświeżenie powietrza w pomieszczeniu nie zawsze się sprawdza, zimą są to dość duże straty ciepła, a także istnieje duże prawdopodobieństwo złapania przeziębienia, dlatego do wentylacji wymyślono wymiennik ciepła – czyli rekuperator.
Mówiąc prościej, znaczenie wymiennika ciepła dla wentylacji polega na tym, że zimne powietrze wpływające z ulicy jest ogrzewane powietrzem wywiewanym z pomieszczenia, tj. następuje wymiana ciepła „brudnego” powietrza ze świeżym, bez mieszania strumieni powietrza.
Cóż, wygląda na to, że wstęp okazał się zrozumiały, więc od razu przejdę do budowy rekuperatora własnymi rękami. W sieci jest wiele przykładów produkcji takich urządzeń, z których faktycznie korzystałem, dodając trochę i przerabiając je dla siebie. I tak potrzebowałem takiego wymiennika ciepła do pokoju wypoczynkowego, to pomieszczenie o powierzchni około 24 m2, przedzielone ścianką działową, do pewnego czasu służyło jako jedyne pomieszczenie mieszkalne.
Do produkcji rekuperatora potrzebowałem:
- Poliwęglan komorowy – 1 arkusz 4mm (210 x 600 cm.)
- Ekstrudowana pianka polistyrenowa (XPS)- 5 arkuszy 30 mm (120 X 60 cm)
- Na początku Wentylatory liniowe 100 mm (wydajność 100 litrów/godz.) — 2 szt. – potem zamienione na większe.
- Pianka montażowa.
- Klej do plastiku.
- Przewody do podłączenia wentylatorów.
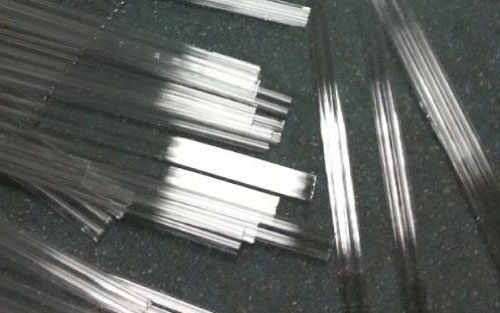
Na początek przeciąłem płyty poliwęglanowe okrągłym nożem, według metalowej linijki.

Jeden strumień powietrza przejdzie bezpośrednio przez poliwęglanowe plastry miodu, a drugi, przecinając go, musi zostać wpuszczony między te płyty, w tym celu wycinam paski (słomki) z tych samych płyt, aby móc je następnie skleić klejem do plastiku.
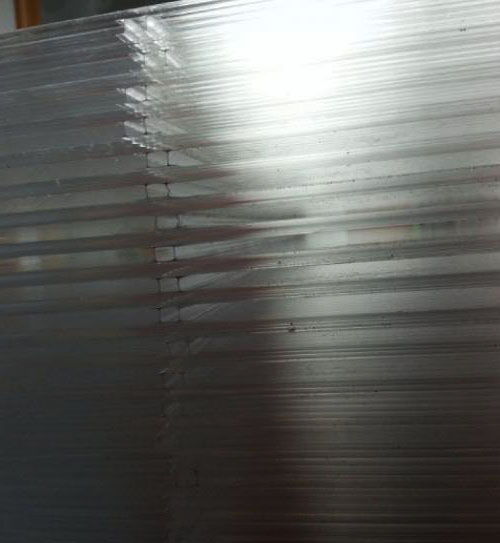
Po sklejeniu płytek wygląda tak.
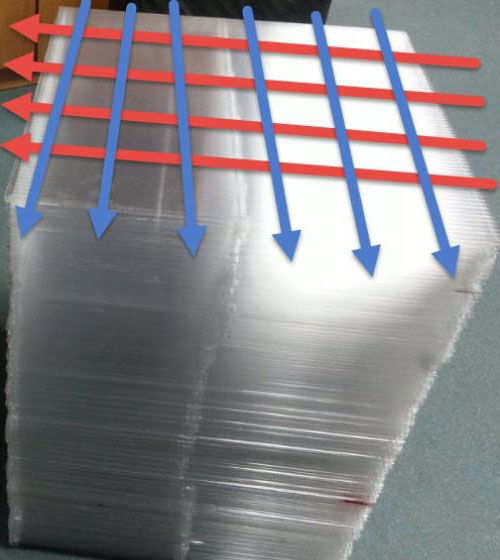
Na zdjęciu po sklejeniu klocka, strzałki pokazały ruch przepływów powietrza. Strumienie biegną wzdłuż całej wysokości bloku. Będą dwa takie bloki.
Bloki są gotowe, muszą być tej samej wysokości.
Po wykonaniu głównych bloków wymiennika ciepła – rekuperatora, zrobiłem pudełko z ekstrudowanej pianki polistyrenowej XPS, użyłem pianki montażowej do klejenia, po prostu nałożyłem ją na końce i docisnąłem, położyłem bloki wymiany ciepła do montażu, tak to wygląda.

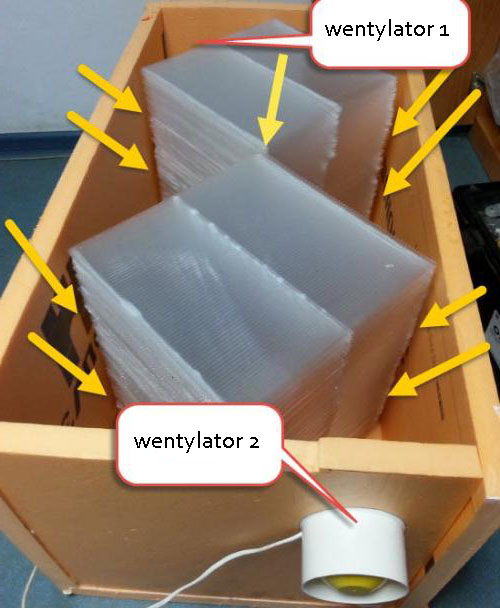
Zamontowałem wentylatory, drugiego nie widać na zdjęciu, żółte strzałki pokazują szczeliny, które też trzeba zatkać pianką.
Właściwie ten domowy rekuperator jest prawie gotowy, jego montaż jest następny w kolejce. Jak pisałem na początku artykułu była zrobiona do pokoju wypoczynkowego, ale zainstalowałem ją w pralni, skąd świeże powietrze jest już doprowadzane kanałami powietrznymi, przez wymiennik ciepła i brudne wilgotne powietrze z nieprzyjemnymi zapachami, jest wydmuchiwane. Na zdjęciu, strzałki pokazują, jak poruszają się prądy powietrza.
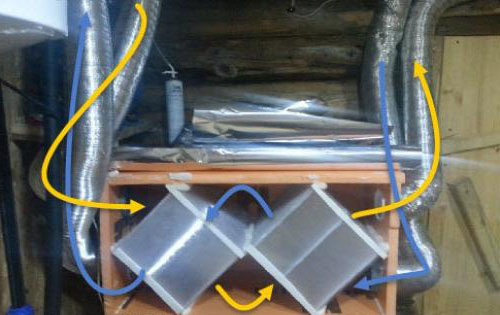
Żółte strzałki wskazują przepływ wydmuchanego powietrza, a niebieskie strzałki wskazują przepływ wtłaczanego (świeżego) powietrza. W wyniku spotkania się tych przepływów w poliwęglanowych wymiennikach ciepła następuje wymiana ciepła, która powoduje podgrzanie napływającego zimnego powietrza do temperatury zbliżonej do pokojowej, czyli przy temperaturze zewnętrznej -5 do -10 stopni, jeżeli temperatura jest niższa, to oczywiście napływające powietrze jest zimniejsze.
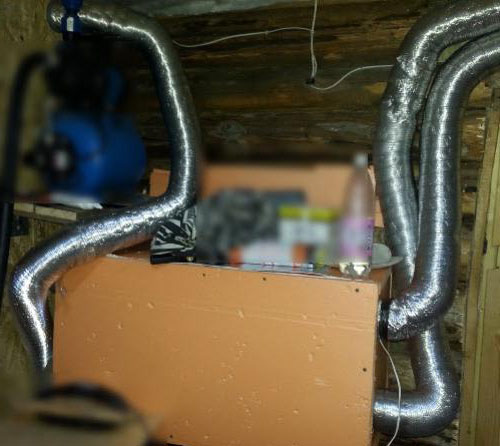
Rekuperator w gotowej zmontowanej formie wygląda tak.
Pokrywa jest mocowana długimi wkrętami do drewna, można w nią wtopić szkło, aby obserwować kondensat i inne procesy zachodzące w wymienniku ciepła, w moim przypadku zimne powietrze zaczyna się nagrzewać już w kanale powietrznym, więc nie ma kondensatu w nagrzewnicy wymiennika.
Rozwiązywanie problemów lub wnioski.
Aby przepompować takie kanały powietrza potrzebne są wydajniejsze wentylatory, musiałem dołożyć jeszcze jeden wentylator przy wejściu do kanału powietrza przy wejściu na ścianę, ale lepiej zamontować wentylatory na 150 mm, z wydajnością 300 litrów na minutę, tylko one występują tylko w średnicy 150 mm, można kupić wentylator kanałowy 125 mm, o dobrych osiągach.
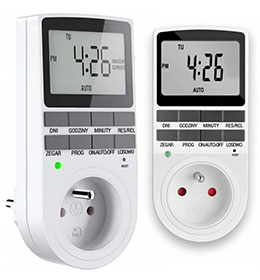
Wygodne jest również ustawienie pewnego rodzaju przekaźnika czasowego na włączenie domowego wymiennika ciepła, aby włączał się raz na godzinę na 15 minut lub inny czas. Można użyć prostego timera czasowego.